Are you bored!? Do you have an old
PowerPC Mac running OS 9? Do you want to personalize it beyond human
comprehension and theme it all around potatoes?
Then let's mod Mac OS 9!
Hi guys!!! So I figured out how to put
a bunch of epic cool mods on your silly goofy iMac, iBook, Power Mac (i want
that g4 tower grr), and whatever other medieval(?) era computer you have!!!
What you need!
I will not provide links to everything that I mention, but it's easy to find on sites like Macintosh Repository and Macintosh Garden. -
Mac OS 9 (duh) - You can do this on Mac OS 8 and 7, but our tools won't run, I used Mac OS 9.2.2 for mine. A full or an install with features listed below should work.
Our OS 9 install should feature: -
Appearance Control Panel - people most likely already have it, like what man uses Mac OS without an APPEARANCE panel of all things!
-
QuickTime - allows us to view pictures and videos and play music and all that stuff.
-
Stuffit Expander - Classic Mac's 7-zip and WinRAR. Practically nothing can unpack Stuffit's .SIT archives than Stuffit itself, even modern macOS can't do it (I think).
-
SimpleText, Disk Copy, Disk First Aid, and other utilities included with OS 9. We will most likely need them.
Though it is optional to use everything else, I would highly recommend it so our OS 9 install wouldn't feel bland, it doesn't take that much space (less 1 GB, it's when you don't have enough space when you don't need everything.)
Tutorial last updated: February 10, 2025.
Update Log:
Feb 12, 2025
Page fix.
Feb 10, 2025
Updated to match website theme.
Feb 9, 2025
Initial commit.
-
l that jazz to modify Mac binaries back in the late 80's and early 90's.
-
GraphicConverter 6.5: MUST HAVE! Allows us to more easily modify pictures and even make boot screens.
-
Adobe Photoshop 7 (OPTIONAL!): It is the last version that runs on Mac OS 9, and it's really just for even easier picture modification, since it's like, pro tools, and stuff, completely optional since GraphicConverter is a picture editing tool itself.
-
Snapz Pro 2 (ALSO OPTIONAL!): That allows you to screenshot your system, without the hassle of converting PICT files to JPG afterwards, it allows you even to record your screen, but "Unregistered HyperCam 2" quality. I'm the only one that really needs it, since I'm recording the tutorial, but you may also need it to put text in your startup screens for example.
-
Stuffit Expander: This comes with Mac OS 9, especially our full install, but make sure you have it!
-
Kaleidoscope (optional, if you want to use more
themes) - External theme manager,
That should be everything! I hope you have everything we need.
Also by the way, to extract Stuffit (.sit) archives, just double click them :3
I don't know about you, but I will treat this like an iceberg. As we go down the rabbit hole, the methods get more complex,
and I will assume you're more of a pro in computing. Got it? Let's go!
Let's begin!
First order of business - back up the System Folder. If something goes wrong we do not want your OS 9 install deep fried. You can duplicate it with CMD+D. This will be your restore point.
Never forget that Mac OS 9 is an insanely modular
system, you can drag Control Panels wherever you want, you can modify files
however you want, you can remove and install extensions just by dragging them, I
won't tell you anything, I will actually only tell you the more complex things,
but you can mess around by opening "Extensions Manager" in the Control Panels
and toggle them on and off.
You can also go to the System Folder on your hard
drive, then go to Startup and Shutdown items, and put something in there that'll
happen during power on and power off.
There's also a program called Kaleidoscope, it works
even on System 7 and above. You can use it for additional theming. It may even be
simpler to theme with Kaleidoscope than with Apple's offerings. Actually I'm
going to put an article on how to build with Kaleidoscope in here too.
To make an alias of a file, you can press Command + M
(I will refer to the Command key as CMD from now on). To duplicate a file, press
Command + D. There is no copy and paste in classic Mac OS, only file
duplication.
As Apple themselves said once (paraphrasing), even
a kid can do it!
I hope I set the ground rules.
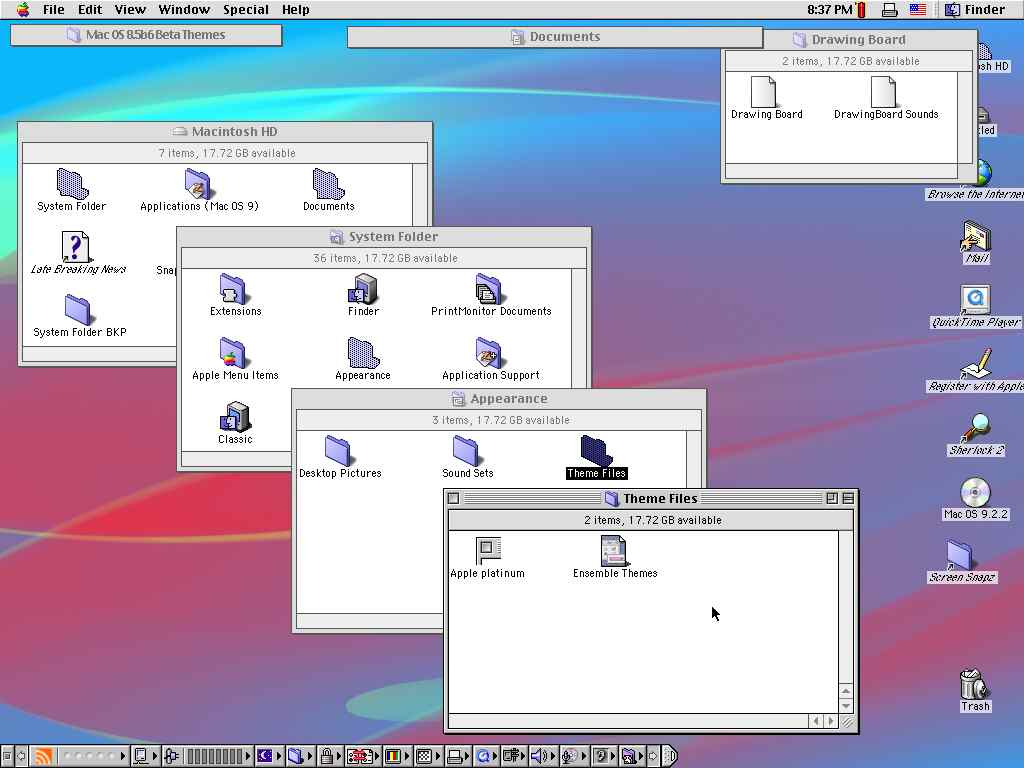
Grab some themes if you want, I found the 8.5 beta themes on the Macintosh Repository, no links provided, sorry. To put custom themes on your Mac, you first grab the theme file(s),
Then you drop the theme file to the Theme Files folder, which is in the Appearance folder, which is in the System Folder. (Macintosh HD -> System Folder -> Appearance -> Theme Files, or look at picture below.) Then drag your theme in.
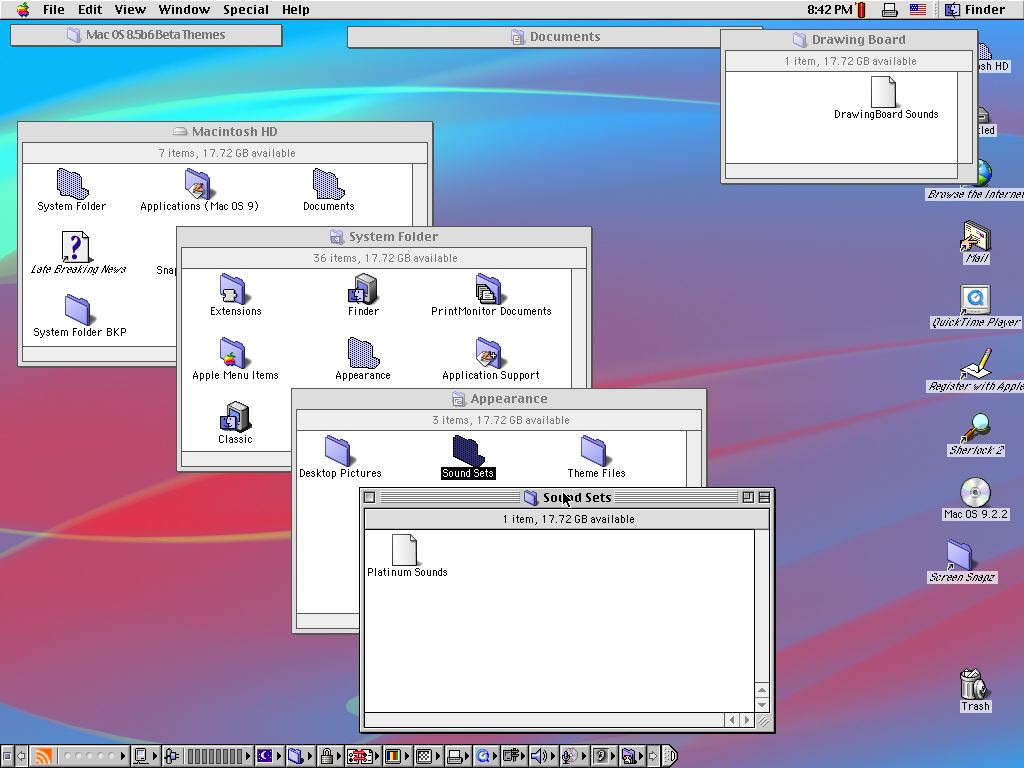
Alright, good? Let's do the sounds. Just as simple, go to the Sound Sets folder in the Appearance folder (Macintosh HD -> System Folder -> Appearance -> Sound Sets, or look at picture below.) Then drag your sound set there.
You can also go back up, to Desktop Pictures, and drag all the desktop pictures that could've been possibly included with your system. (Macintosh HD -> System Folder -> Appearance -> Desktop Pictures)
Your themes now should appear in the Appearance Control Panel.
Desktop patterns and wallpapers are also easy to change. You can go figure them out yourself since they're really easy to understand and change.
Startup Screen (simple version)
Open up Graphic Converter. Make sure your Mac doesn't pull out a Rosa Parks and kamikaze's the entire operating system.
Now go to Edit in the top bar, and go to Preferences.
I sadly can't screenshot anything in GC because it crashes my Mac. "Stability�", so I will use the graphics from Macintosh Repository - Thank you kind men you saved my life you knights in the shining armor, hehe.... :3
In the Preferences window, go to File Formats. Enable "Startup Screen", And IMPORTANTLY - Remove the .SUP extension, make it be blank.
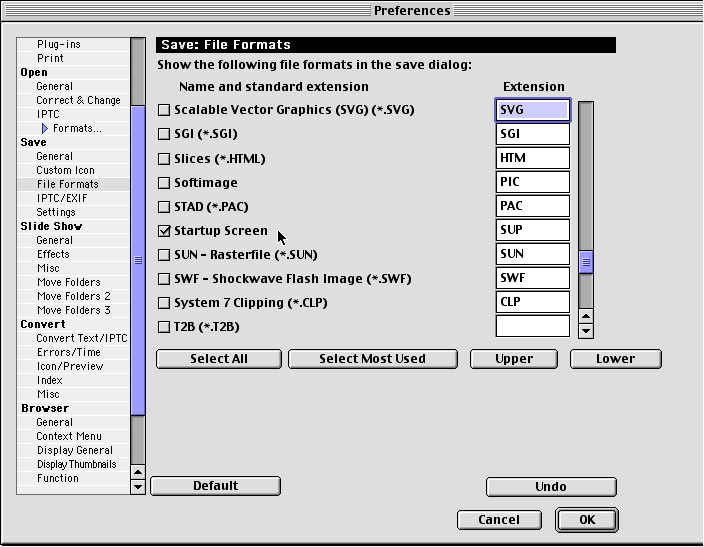
Now press OK.
Make a new file or open whatever image you want to use for your startup screen, I will use this banger basketball image. If someone thinks it isn't a banger... er...
"In the first age, in the first battle, when the shadows first lengthened, one stoo-"
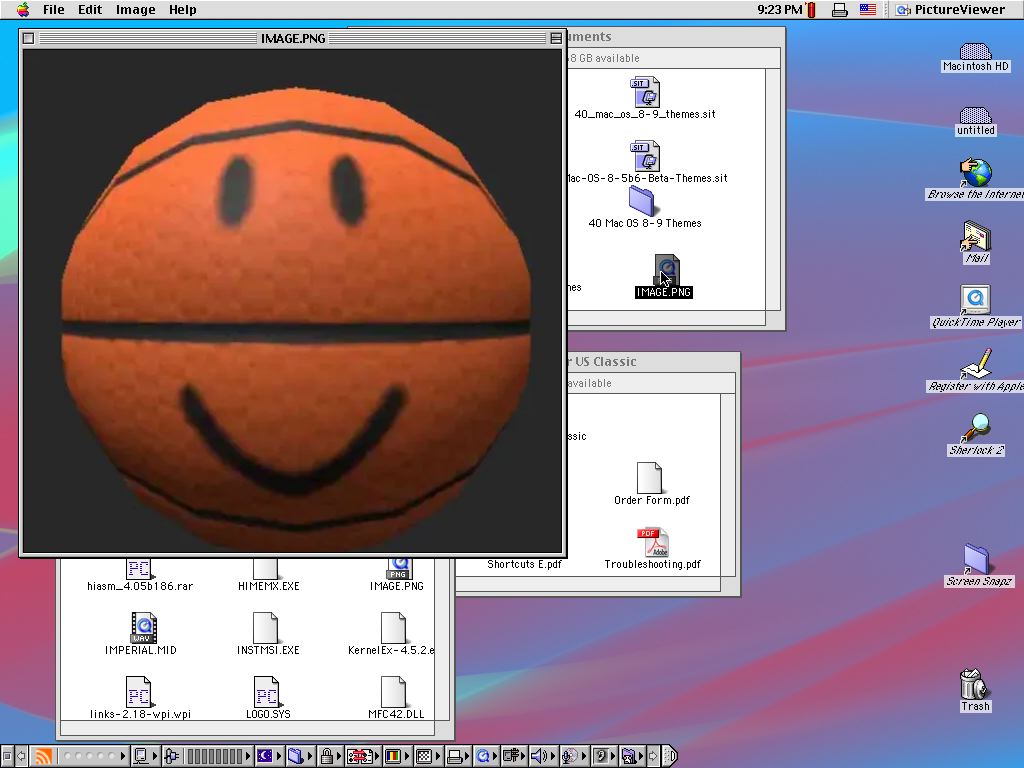
Open your image with GraphicConverter. Edit however you want, and go to the "File" menu, and then press "Save As".
Now there, on the top click the dropdown, and select Desktop, if not already selected. Go to Macintosh HD, or wherever you installed Mac OS, go to System Folder, in the Format dropdown, select Startup Screen. Name your image "StartupScreen" (no quotes, exactly as written, case sensitive). Click "Save". If it says "The image has an alpha channel, but the selected format does not support an alpha channel", click Flatten and Save. Reboot your computer to see the changes.
Note that even though your boot screen shows up, you will not see the progress bar but only the extension icons at the bottom.
Now to delete it, you have to go to the System Folder, and remove your
"StartupScreen" image from there. You will get the Mac OS 9 boot screen back.
Let's learn Kaleidoscope!
Down in Ukraine, I saw a lot of those
crappy Windows XP builds on CD's. They stopped making those years ago, but my
dad has a "crappy build" of Windows 98. The disc is gone, but the box is still
here.
Those builds
usually had a custom theme, some of them likely used custom offerings by people
like Stardock! Kaleidoscope here, is something like Stardock's theming offering,
except for Classic Mac OS, back from System 7! Kaleidoscope also seems to be
compatible with Mac OS 9, so let's begin to install it!
Kaleidoscope can be downloaded on
Macintosh Repository (cough cough no serials or links provided). Schemes for
Kaleidoscope can also be downloaded on the Macintosh Repository.
First step of installing Kaleidoscope,
is to revert your theme to Platinum. This is so there won't be any stupid
conflicts. Save everything before starting the installer.
Note: Kaleidoscope will
not modify any startup screen modifications.
The Kaleidoscope version I will use is
2.3.1. You open the installer, and follow what it says. It's like a regular
Windows setup wizard. It will tell you to restart, so click Yes when prompted.
Kaleidoscope comes with some themes already built in, like the BeOS theme. Once
it's done, click Restart, and wait for your computer to boot up again.
Once Mac OS loads, it will show you
this notification. We will follow its orders! Click the Apple menu, it will have
a Kaleidoscope Schemes prompt, select a theme and, Tada!
It does its job really well. Note that
the Platinum theme is not the original one, but the one that is used in Copland:
Apple's failed Mac OS 8 prototype, the Platinum theme was repurposed for the
real Mac OS 8. To supply custom Kaleidoscope themes, go to the Apple menu, and
pick Kaleidoscope Schemes. Drag your themes there.
To additionally configure
Kaleidoscope, go to Control Panels and find Kaleidoscope there. You can also
register it here.
If you want to undo Kaleidoscope, go
to Control Panels, then open Extension Manager. Find Kaleidoscope in the
Extension Manager, and disable or enable the checkmark.
You can use Apple's own Appearance
Panel to change icons, fonts, and sound sets, but most Kaleidoscope themes ship
with their own icon sets.
Fonts can also be changed in
Kaleidoscope.
Making a new theme with Kaleidoscope.
Kaleidoscope is the genuinely better option for
custom theme making than Apple's offering is. It's less confusing than Apple's,
and I actually know how to use it, because "Theme Machine", a modding program
for Apple themes, is really stupidly difficult to use for me, I couldn't figure
it out.
To make Kaleidoscope themes,
grab yourself the Scheme Factory, can be found on Macintosh Repository. It was
never finished, but it should work for us. I am not sure if using the free
version is limited, but I registered it, and so should you!
We are now in Scheme Factory, on the top bar, go to
File, then New, save your scheme wherever you want to. You can use
GraphicConverter or Adobe Photoshop to make items. It's literally the easiest
tool to use - self explanatory. Editing colors brings up a color wheel, and
editing all the other stuff allows you to paste a picture in.
Grab an image of what you want to edit, say the
Menu Bar. Grab Apple's Preview app, or GraphicConverter, or Photoshop, and
select all of the picture, then press CMD+C, go back to Scheme Factory, and
double click what you want to use the item for. It will ask if you want to use
the picture on the clipboard, press Yes. It will bring a simplistic image
editor, do what you need to do. After you're done, close your editor. Once it's
all good, the gray icon on the left of the part should turn blue.
Once you did everything, go to File, then Save. And
your scheme should work.
Modifying the System File
Startup Screen (elaborate)
We are now about to go down the deep end. This one
allows you to see the progress bar alongside the picture. You have to make
several versions of the picture too. I'm going to show you. Don't be stressed,
we're going to go through this.
First step - let's open Apple's ResEdit. It is a
68K program, but it is compatible with PowerPC. Click when it shows the ResEdit
logo.
It shows you a file picker. Click the Desktop
button on the right. We're going to Macintosh HD (or whatever you named your
hard drive/SD card/SSD/whatever). Then go to System Folder, open "System".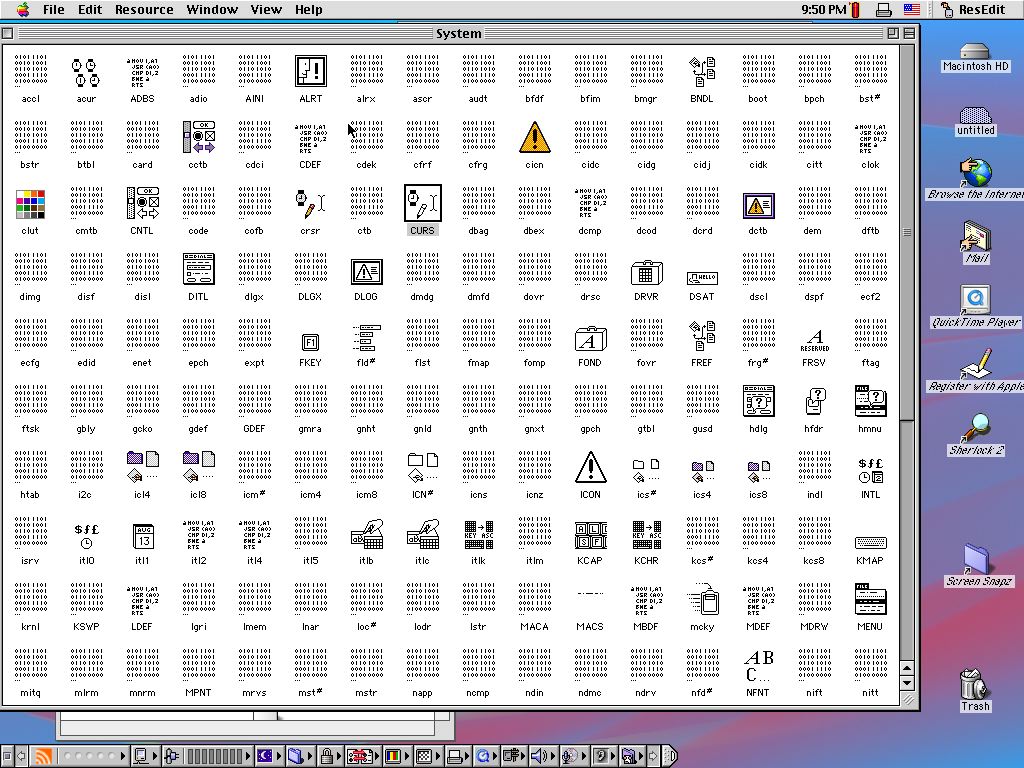
It will tell you that "Editing the System or
ResEdit is not recommended." Press OK. We backed everything up anyways... right?
I hope you did... ha ha...
IMPORTANT: IF YOU HAD A "StartupScreen" FILE IN THE
SYSTEM FOLDER, REMOVE IT! OR BACK IT UP!
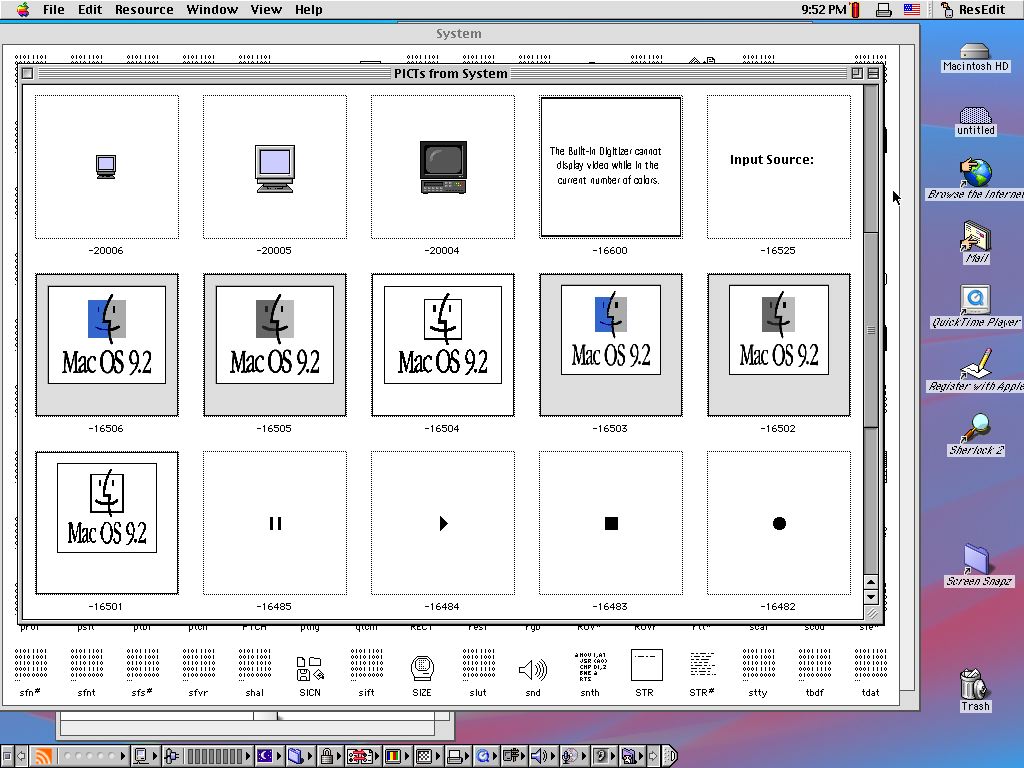
In there, you will see a bunch of icons. Find one
that says "PICT" in it. They're arranged in alphabetical order, I hope that
helps.
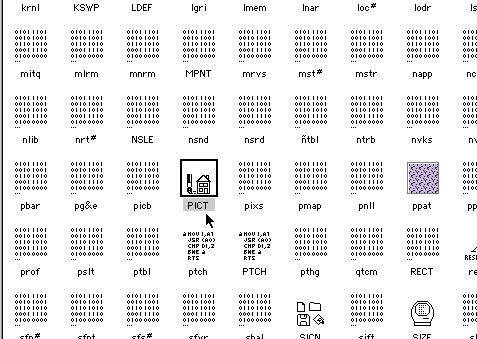
Double click it. You will get a bunch of pictures,
including folder and computer icons. Scroll down and, TADA!! you got the startup
screens!
Let's now open GraphicConverter.
Open your picture, and modify it however you want.
You don't have to save it. Highlight what area you want to use for your image,
and press CMD+C, then go to ResEdit. In ResEdit, open one of the Mac OS 9 logos,
and press CMD+V. Your image should now be loaded. Fill it for everything else if
you want, make black and white specific versions. Do whatever, you can modify
other graphics, but we're only doing the boot screen right now.
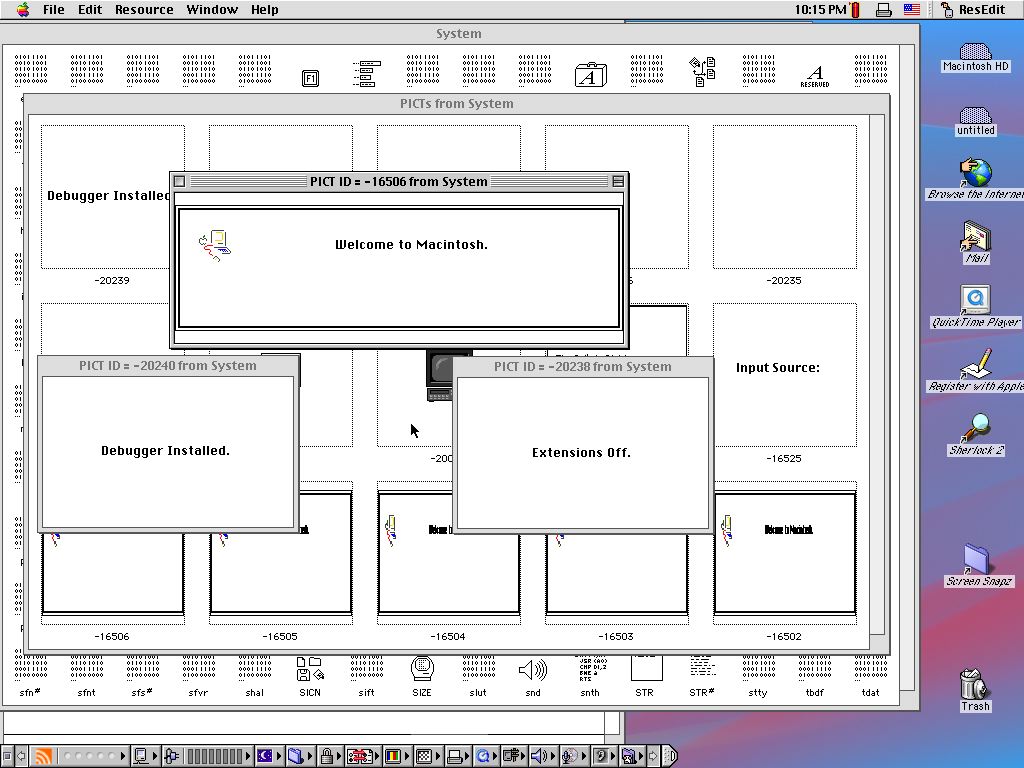
Scroll back up, and you see the "Welcome to Mac
OS", "Debugger Installed", "Starting Up..." and "Extensions Off" texts, in
monochrome and grayscale coloring. DO NOT DELETE THEM IF YOU DON'T WANT THEM,
instead go into GraphicConverter and replace it with a blank, or alternatively,
replace them with your own text that fits.
This is how my Picasso Mac mod looks in ResEdit:
Now you can close it, save it, and restart your
computer to see your results!
If you like it, keep it. To reverse it, delete the
System file (looks like a briefcase with the finder icon) in the System Folder,
then put the original one (duplicate it with CMD+D) from your backups.
After you restart, you should have your default Mac
OS 9 boot screen back.
That's it for this part! You can also individually
copy tiles from the original with ResEdit, but that's more work, but it's the
only option if you did something else to the System file, like modifying the
mouse cursors, since if you load the full original backup, your progress is
reversed.
[Doesn't work! May work on certain
systems.] Some icons (and cursors)
This one may be easier than the last one, actually.
Here's what you do:
Open ResEdit. Go to Desktop, Macintosh HD (or your
install location), System Folder, and then your System file. You will be in that
same tile window again. You can edit "CURS", "crsr", "cicn", "icl4", "icl8", "ICON",
"ics#", "ics4", "ics8", "ICN#", "PAT" and "PAT#", there are probably more, but
these are the ones which I am sure are graphics. When you double click on one,
it opens a pixel art editor. It's fairly easy to figure out.
Note: I did not see any changes in
editing the Apple logo in the ics8, CURS and crsr (restarting takes too much
time, and it likely won't do anything, I tested with SimpleText), but I am
pretty sure you can edit them and get something out of it. Your CURS and crsr
mod will most likely either not work at all, or not work with all software.
Please beware. Other edits may not work either because apps can use their own
icons or the icons are stored somewhere else in Mac OS (like the Platinum or
other theme file). Might work on Mac OS 7, 8 or 8.1, but not 8.5 when the themes
were fully introduced.
Modifying the
Finder
About box image
Get your ResEdit and Graphic Converter - we are
modifying the "About this Macintosh" box. As always, let's go to System Folder.
There find "Finder". Open it in ResEdit. It has way less elements than System.
Go to PICT. The only picture there will be... The Mac OS 9 logo! (make sure
ResEdit doesn't pick the nuclear option to go commit die.)
Copy your image from ResEdit. Now open Graphic
Converter. Go to File, then point at New, then "Image using Clipboard". Edit
your image however you want or drag in another image. If you want to start from
scratch, know that the image's resolution is 454x90 pixels. Please try to
maintain it.
After you finish it, paste it into the PICT
resource in ResEdit. Restart your computer and see the changes.

this er, won't cause any controversy right?
Text Strings & Icons
Open ResEdit, and open the Finder in the System
Folder, unless both are already opened, you can pick STR, STR#, ALRT, and DLOG,
STR is regular strings, ALRT is the error messages, STR# is (what it seems like)
baloons, and DLOG is some printer dialogs. Icons can also be modified in ICL4,
ICL8, ICN# and ICON, but icons are most likely stored in the theme files, which
you can also modify.
Startup
QuickTime Movie. (THERE WILL BE NO AUDIO!!)
Introduction
A long, long time ago, on the 68kMLA forums
there was a tale, a tale of the so-called Startup Video, which played before the
Macintosh's startup process. There was no evidence it worked. There was no
evidence of it existing, other than this forum post. There is basically no way
to test it out, all modern codec's have surpassed the limitations of the
primitive QuickTime shipped with Mac OS 9. This requires true dedication. No
.MOV conversion tools have been found by me on the Internet. So we will convert
MPEG4 videos on our Mac to do it. Let's start.
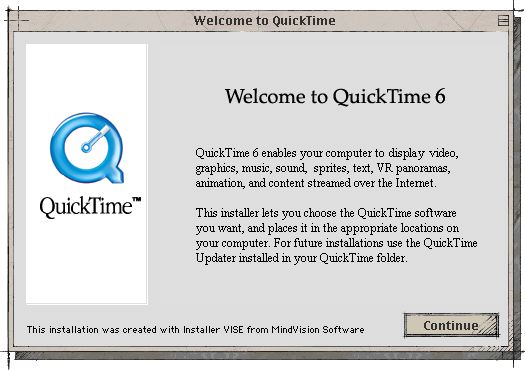
For this we need the latest version of QuickTime
compatible with OS9 - QuickTime 6. Installing QuickTime 6 is similar to Windows
Setup Wizards.
Find an MP4 video to use for your system's startup.
It has to be compressed with MPEG-4. NOT H.264 SINCE IT WAS
RELEASED AFTER OUR TOOLS!!! Make sure your video works on OS9.
Okay, so now we need QuickTime 6 PRO. Pro because
it allows us to export movies. If you didn't register QuickTime during install,
or you're not sure, go to Edit, then Registration. If it says "QuickTime Key:
6.0 Pro Player Edition", you're all good.

In the File menu, click "Export". Export your video
as a QuickTime movie. Now wait.
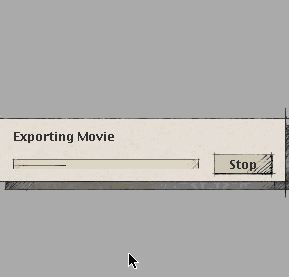
Exporting will take quite a bit, especially if you
have a G3 or older.
After exporting, copy your video to the System
Folder, call it StartupMovie, then duplicate "StartupMovie" and call it "Startup
Movie" (with a space), make sure it has no extensions. Your video will play on
startup, but without any audio output, and the progress bar will overlay the
video after it is finished playing. If you do not want the progress bar to show
up, use the Startup Screen (simple) mod
with this.
Making a
new theme (Apple's offering)
This is record breakingly stupid
and difficult. If you are not willing to rip your hair out, use Kaleidoscope.
Apple really doesn't want you to build your own themes. So they made it as
confusing as possible, and didn't provide any tools. "How do people make their themes??" you ask,
well my guys, gals, non-binary pals, I have no f***ing idea!!! Get your copium
ready, let's begin!
After researching for HOURS, I found two tools -
Theminator, which didn't even work, and Theme Machine, which Theminator seems to
be based of off. So we will use Theme Machine.
We need all the usual tools, ResEdit,
GraphicConverter, but there are two more needed
- Drawing Board (Mac OS 8.5 Beta Theme) - we can
download the 8.5 Beta themes off the Macintosh Repository. Drawing Board
specifically is needed, because it's the least obnoxious, and can be loaded
in Theme Machine. And a theme literally called "Drawing Board" really fits
the criteria of a "template". To install themes, scroll up to
Simple Modifications
- Theme Machine - the program we use to make
themes.
Go to where you put the Drawing Board theme,
duplicate it and call it whatever you want your theme to be called. Open Theme
Machine, and load YOUR theme, not the Drawing Board. There will be windows
layered on each other, move them away.
This program will be confusing. Required
Brushes is color palettes your theme might use. You can edit them. Same with
text colors. User Brushes seem to be images and/or additional colors.
At the top, the PXMs option allows you to edit
specific images and/or shadows for your theme. The Layout, Required Frames, and
User Frames option at the top allows you to change window and top bar menu
elements.
The main window allows you to change some values
for your theme.
You can use GraphicConverter and Photoshop to edit
the elements, unless it provides you with its' own pixel art editor.
Once you're done, press File, then Save, then open
the Appearance control panel, and test your CREATION.
I got barely any clue how to use it but it is
possible to figure out. I walked so you could limp and fall and break all your
bones.
Troubleshooting
If your Mac doesn't boot anymore:
Get your backup and Mac OS CD ready, if you didn't
make one, or you don't have a Mac OS CD, buddy you're just so cooked you may
just go smoke weed and throw your computer away. So at least burn a CD so you
can reinstall the OS, if you have everything, let's go.
Load into Mac OS on your disc, hold C on startup,
or hold OPTION, and select the disc. Load it. Go to your backup and rename the
System and Finder files to something else, make sure you don't flip them around.
Then proceed to go to your System Folder and either delete what you are sure is
the faulty one, or if you don't know, delete the System and Finder files. Go to
your backup, duplicate, then drag the files which you just removed from your
backup to the System Folder. Name the files you dragged to the System Folder the
names they were originally called. Restart the computer from the Mac HD and pray
it works.
If you see the Happy Mac at the end, you got
it, yippie!
Conclusion
I hope you enjoyed modding Mac OS 9! Honestly, I'll
probably keep it stock except for a few pranks to my friends, and maybe a theme.
Some things are just intended to be how they were designed. Maybe you can make
your own build of Mac OS 9 and share it with the internet.
(imagine trans os 9 releasing that'll be
actually so funny lmfao)
Anyways, thank you for reading this, I hope you
enjoyed.
Don't forget about the backup if something goes
wrong.
|